In affiliate marketing, if you want to properly track and optimize your campaigns, you’ll eventually need to use tracking software.
This is an important concept to understand.
I usually call it a tracking tool, but many marketers simply refer to it as a tracker.
So what exactly is a tracking tool?
A tracking tool helps affiliate marketers monitor campaign data, analyze performance, and target users more effectively.
With tracking software, you can see information such as:
- The customer’s country
- Which ad creative they clicked
- What type of phone they are using
- What time of day they clicked
- Their carrier and browser
These data points are extremely valuable because they help you optimize your campaigns and improve profitability over time.
Understanding the Benefits of Tracking Tools
Time of day is one of the most important metrics you should monitor. For example, let’s say your campaign data looks like this:

Tracking software can show you which hours of the day generate the highest profit.
This is especially important when promoting affiliate offers.
For example, conversions may be lower during the afternoon because people are busy working. But later at night — around 10 PM — conversions might increase significantly.
Of course, this is just a simple example to help you understand the idea. In real campaigns, the data will always vary.
- Different countries have different time zones and user behaviors.
- Different types of offers also perform differently.
If you can properly “read” your campaign data, you’ll know exactly what actions to take to make more money. Once you identify the profitable time periods, you can:
- Turn off ads during unprofitable hours
- Increase bids during profitable hours
Note: In this article, I’m only covering the basics. For people who learn quickly and think analytically, this is already enough to get started.
If you want more advanced tutorials and deeper strategies, you can join the membership program and access the advanced courses.
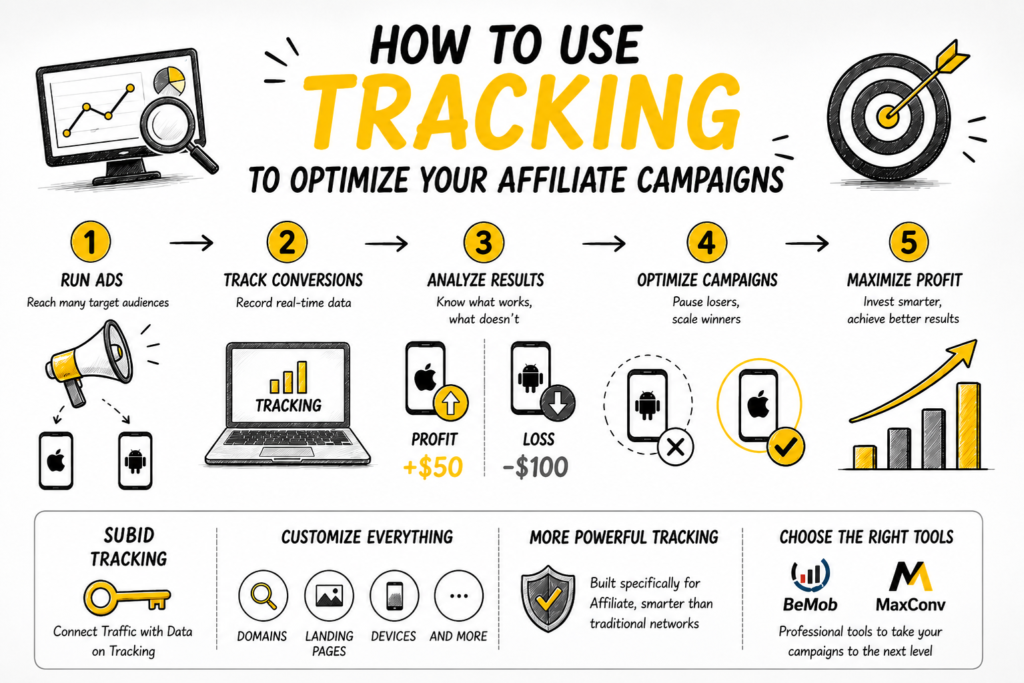
A Simple Example of Using Tracking Tools to Optimize Affiliate Campaigns
Let’s say you’re promoting a VPN software offer that helps users browse the internet more securely. You earn a commission whenever someone signs up for a free trial.
In this affiliate campaign, you decide to run ads targeting both iPhone users and Android users (such as Samsung devices).
After running the campaign, your tracking tool shows the following results:
- You made a $50 profit from iPhone users
- You lost $100 targeting Android users
So what should you do?
Simple.
You stop running ads to Android users and focus entirely on iPhone users instead.
That’s the power of tracking data.
Every affiliate network already includes a built-in tracking system for affiliates.
These systems usually work through something called a subID (sometimes referred to as ClickID or pub-clickID).
As you can see, subIDs themselves can already be used to track valuable information.
For example, you can use them to track:
- Keywords
- Ad creatives
- Device types
- And more
However, in real affiliate marketing, very few experienced affiliates use subIDs manually like that.
Instead, we let the tracking software handle everything automatically.
Why?
Because dedicated tracking tools are specifically built for affiliate campaigns, which makes them far more powerful than the basic reporting systems provided by affiliate networks.
There are many tracking tools available today, but personally, I use BeMob and MaxConv.
If you learn to use the same tracking tools that professional affiliates use, your learning curve will become much faster.
Choosing the Right Tracking Tool for Affiliate Marketing
There’s no such thing as the “best” tracking tool.
The real question is: which one fits your campaigns best?
- Some tracking tools are better for Facebook and Google Ads.
- Others are designed more for Native Ads or Banner Ads.
- And some are optimized specifically for Mobile advertising.
Over the years, I’ve tested many different tracking platforms.
Voluum is often considered the industry leader. It’s one of the most well-known tracking tools on the market — and also one of the most expensive.
I’ve also used RedTrack, which has very strong integration with Facebook Ads and Google Ads.
But personally, the two tracking tools I usually recommend are:
- BeMob
- MaxConv
Why?
Because they are beginner-friendly, stable enough for most affiliate campaigns, and most importantly — reasonably priced.
There are also several other tracking platforms available.
For example, if you’re handling more than 10 million visits per day, you should probably look into Binom.
Ten million visits sounds crazy?
For large-scale mobile advertisers, that’s actually pretty normal.
Important note: Never use Google Analytics to track affiliate campaigns.
It wasn’t built for affiliate tracking, and trying to force it into that role usually ends with wasted time and frustration.
A Quick Note About the VIP Course
In this beginner course, I’ll be using MaxConv for the tutorials because it’s the tracking tool I know best — I use it every day myself.
That said, I’ll mainly focus on the fundamentals here. Personally, I believe that if you’re sharp enough, the basics alone are already enough to get started and figure things out.
However, if you want more detailed and advanced training, you can check out my VIP course called: CPA Affiliate Mastery.

And no — this isn’t some aggressive sales pitch.
I don’t like pressuring people into buying things.
But realistically, websites like this still require money to maintain. I originally started writing because of passion, but passion alone doesn’t pay server bills forever.
If you decide to join the advanced course:
- You’ll learn affiliate marketing in a much more structured and detailed way
- It helps support the website financially
- And if more people join, I’ll be able to afford more coffee while working on new content (I don’t drink alcohol anyway)
With more resources, I can invest in larger affiliate campaigns, learn new strategies, and then come back here to share that knowledge with everyone.
Alright, enough rambling.
Let’s get back to the main topic.
How to Set Up the MaxConv Tracking Tool
Honestly, if you’re the type of person who learns quickly, sometimes just knowing the name of the tool is enough for you to figure out the next steps on your own.
That’s usually how I learn things myself.
I simply open the documentation and start reading. Sure, documentation can feel a bit dry, but if you take the time to go through it, you can understand almost everything.
Here’s a general overview of the MaxConv setup process:
- Create an account at MaxConv.com
- Set up your affiliate network inside the tracking platform
- Set up your traffic source
- Set up your offer
- Set up your landing page
- Configure tracking pixels (if needed)
- Create your campaign
- Launch your affiliate campaign
Creating a MaxConv Account
Go to MaxConv.com and fill in your information.
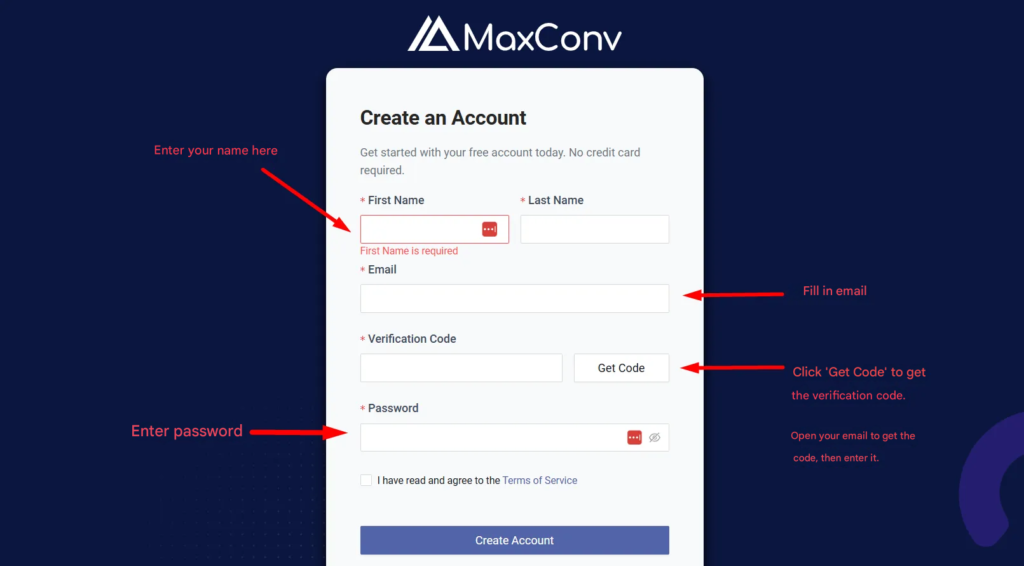
After entering your email address, you’ll need to click the “Get Code” button.
- MaxConv will then send a verification code to your email inbox.
- Open the email, copy the code, and enter it into the registration form.
If you decide to use a different tracking platform instead of MaxConv, the signup process will usually be very similar.
Some tracking tools may send you a confirmation link instead of a code. In that case, you simply open the email and click the verification link.
Once your account is successfully created, you’ll be able to log into MaxConv.
You’ll see the welcome dashboard for your new account. Spend a few minutes exploring the interface and getting familiar with the platform.
MaxConv currently allows up to 100,000 free events per month, which is already more than enough for most beginners to comfortably practice and run campaigns.
If you ever need to upgrade your account later, simply go to:
Settings → Billing
And complete the payment process there.
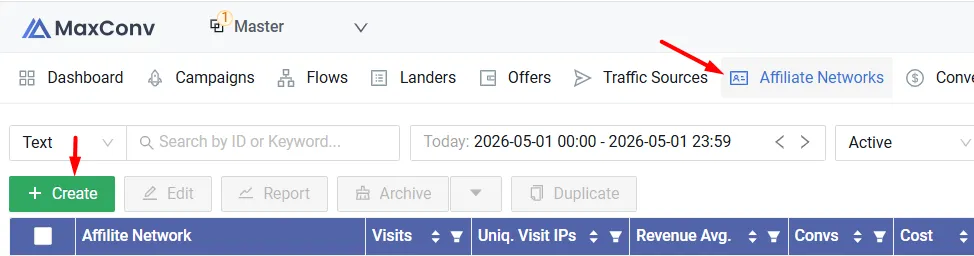
Setting Up an Affiliate Network Inside the Tracking Tool
Next, we need to set up the affiliate network inside the tracking platform.
- Click on “Affiliate Network”
- Click “Create” to open the setup window
- Enter the name of the affiliate network you use in the search box
- Add a few affiliate networks you like by repeating the same process
Quick tip:
Inside this section, you’ll also see the names of many different affiliate networks.
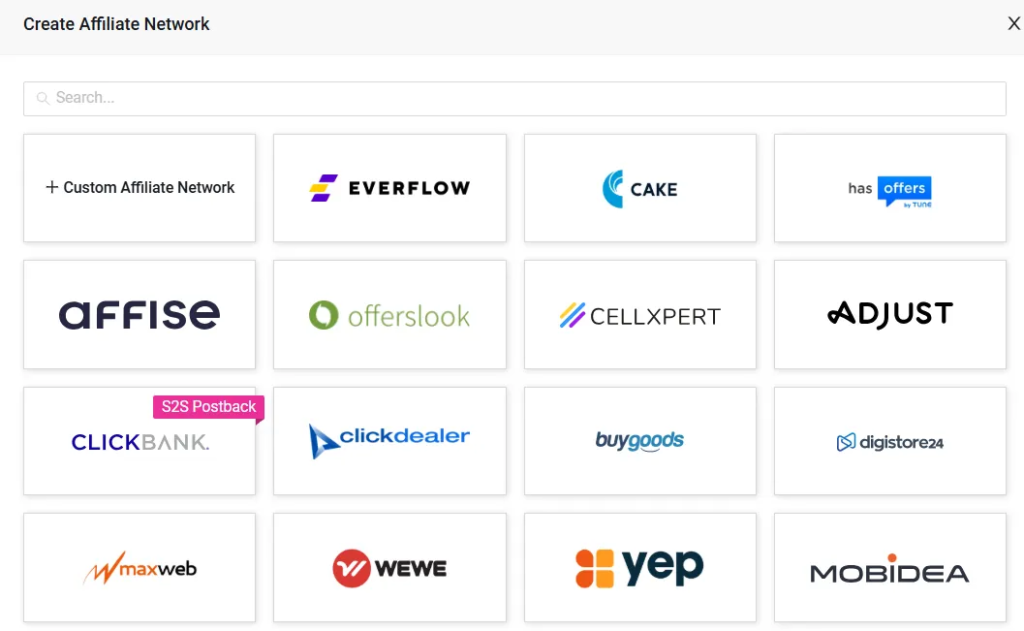
It’s actually a great place to discover new affiliate networks instead of searching through Google, because the list is already quite extensive and organized.
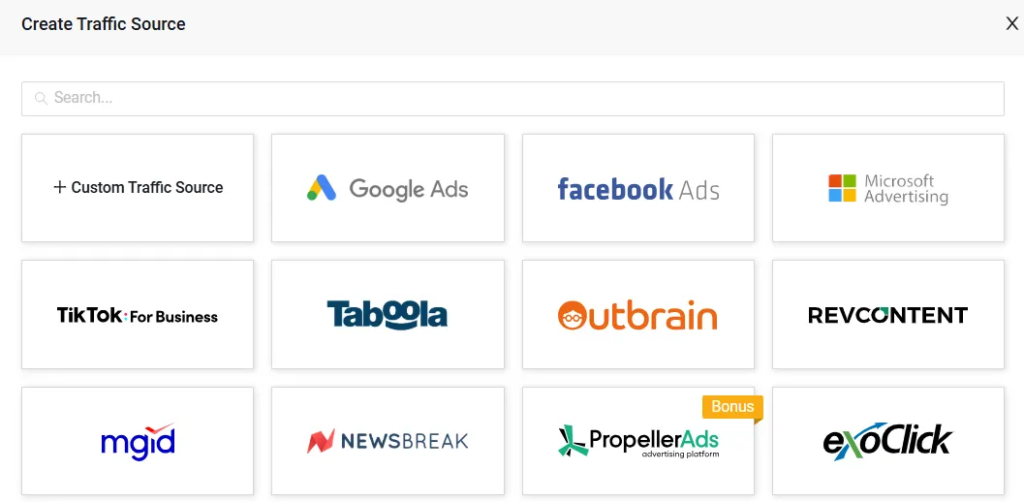
Setting Up Traffic Sources Inside the Tracking Tool
Now it’s time to configure your traffic source.
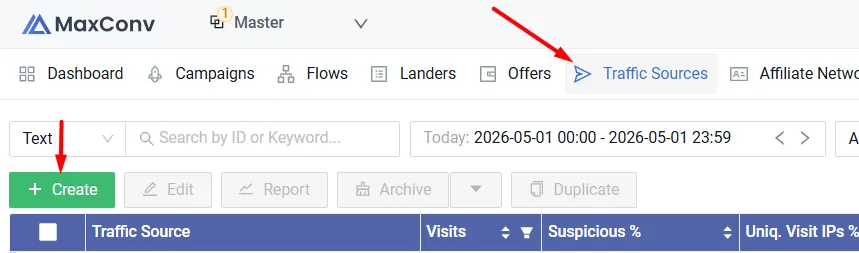
- Click on the “Traffic Sources” tab
- Click the green “Create” button
- A list of traffic sources will appear
- Search for the traffic source you use
- Add the traffic source to your account
After adding the traffic source, click “Save” to store the settings.
Note: For certain traffic sources such as Facebook Ads or Google Ads, you may need to configure additional integrations to connect them properly. The setup process for those platforms can be slightly different from the standard method.
Setting Up an Offer Inside the Tracking Tool
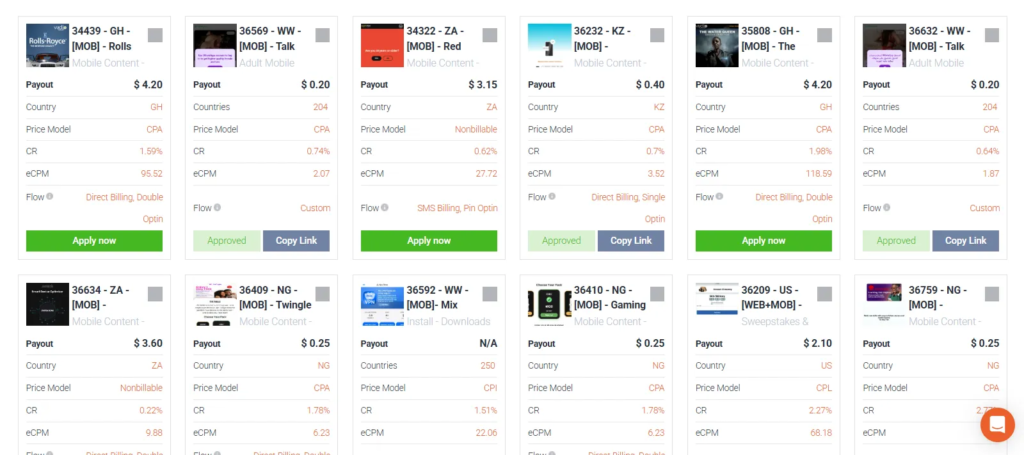
To get your offer URL, you first need to log into your affiliate network.
In this tutorial, I’ll use Mobidea as the example because they’re one of the older and more experienced affiliate networks in the industry.
Inside the affiliate network dashboard, find the offer you want to promote and copy its affiliate link.
Once you have the offer URL, go back to your tracking tool.
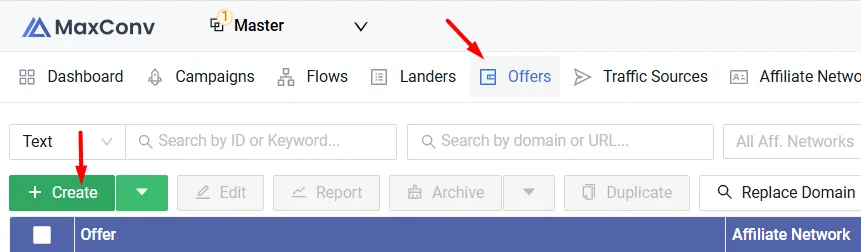
- Click on “Offer”
- Click “Create” to add a new offer
A setup form will appear.
Here, you’ll need to fill in some basic information such as:
- Offer name
- Target country
- Affiliate network
Finally, paste your affiliate link into the URL field.

Next comes a very important step:
Setting up the Click ID.
At this point, your affiliate link still does not contain your tracking Click ID, and you absolutely cannot skip this part.
It’s mandatory.
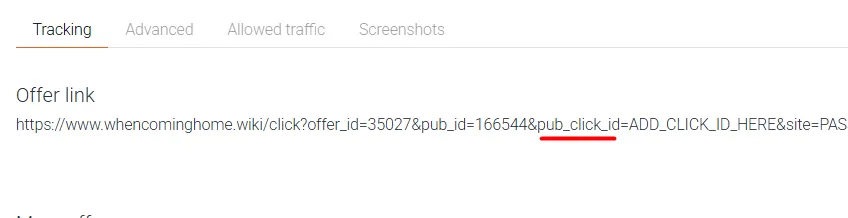
The tricky part is that every affiliate network handles Click IDs differently.
With Mobidea, the setup is simple.
You just replace:
ADD_CLICK_ID_HERE
inside the affiliate URL with:
{mc_click_id}
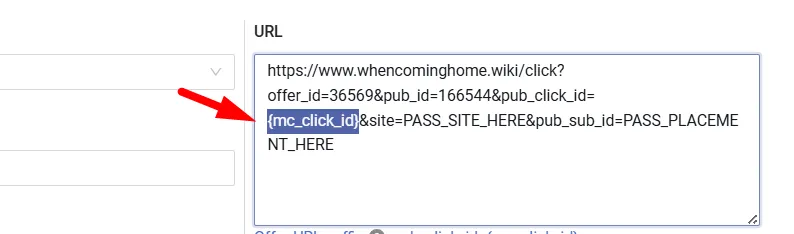
That’s it.
Setting Up a Landing Page Inside the Tracking Tool
This part works very similarly to the previous setup steps.
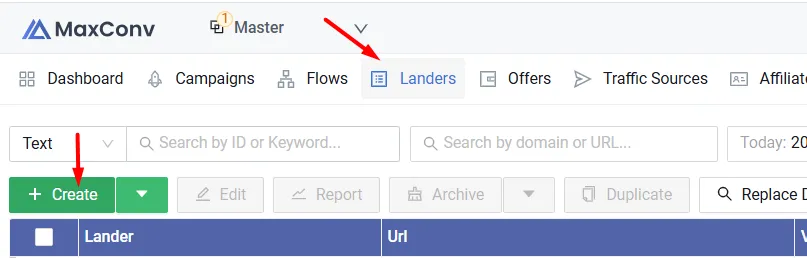
Click on the “Landers” section, then click “Create.”
A setup window will appear where you’ll need to enter:
- The landing page name
- The landing page URL
Try to use clear names so your campaigns are easier to organize and test later.
For example, you could name a landing page:
16.05.26 Headline Test
That way, you immediately know the landing page was tested on 16.05.26 and focused on headline variations.
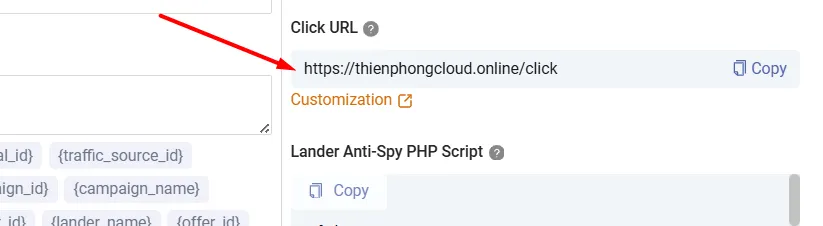
During the setup process, the tracking tool will generate a special link for you called the Click URL.
This part is mandatory.
The Click URL is how the tracking tool collects and tracks campaign data. Without it, the tracker cannot properly monitor clicks or conversions.
Honestly, this part confused me a lot when I first started learning affiliate marketing. Trying to figure everything out alone felt overwhelming at the beginning.
But once you understand the process, it becomes very simple.
All you need to do is place the Click URL into the CTA button on your landing page.
That’s it.
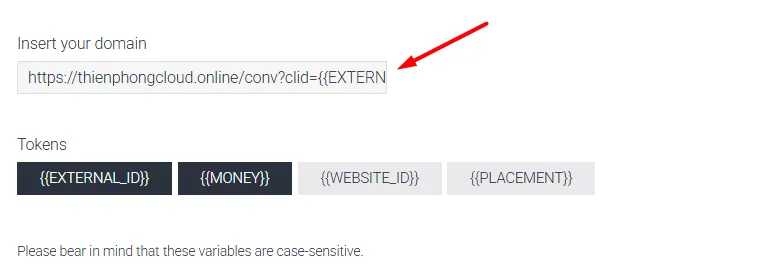
The Click URL usually looks something like this:
https://your-tracking-domain.com/click
Make sure you place it somewhere users can actually click — usually inside your CTA (Call-To-Action) button.
Setting Up the Postback URL
The name sounds complicated, but the setup process is actually quite simple once you’ve done it a few times.
And if this still feels confusing, don’t worry — in the advanced course, I provide step-by-step video tutorials where I guide you through the entire process in detail.
Now, let’s talk about the Postback URL.
So what is a Postback URL?
Many years ago, whenever a conversion happened inside an affiliate network, you would receive a SUBID that looked something like this: absddsdjkds394d4j
Then you had to manually copy and paste that SUBID into your tracking software.
Yes — completely manual.
Fortunately, things are much easier today.
Now, whenever a sale or conversion happens, the Postback URL automatically sends the data directly to your tracking tool. You can instantly see conversions appearing inside your tracker in real time.
Thankfully, the setup is very easy.
In fact, when you configure an affiliate network inside the tracking platform, you’ll usually see a section called “Postback URL” near the bottom-right corner.
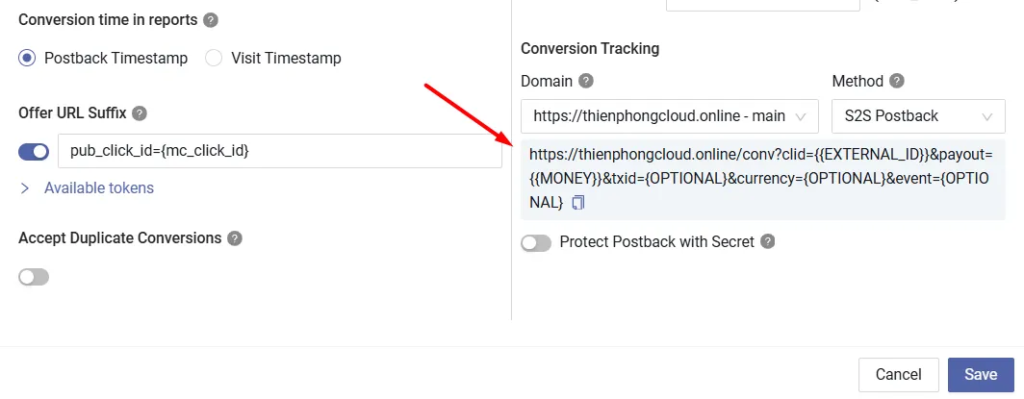
Do you see the Postback URL icon?
Simply copy that link.
Next, place the Postback URL into your affiliate network settings — and that’s basically it.
The tracking tool already prepares all the required tokens for you automatically. Most of the time, it’s just a matter of copy and paste.
Very beginner-friendly.
Quick tip: If you ever get stuck during the setup process, you can simply send the Postback URL to your Affiliate Manager and ask them to help configure it for you.
Setting Up an Affiliate Campaign Inside the Tracking Tool
Relax — we’re almost done.
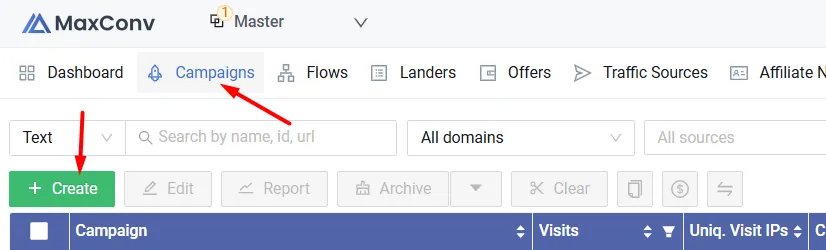
Now it’s time to create your affiliate campaign.
Inside the tracking tool, click on “Campaign” at the top menu. Then click “Create” to start a new campaign.
A setup window will appear. It should look something like this:
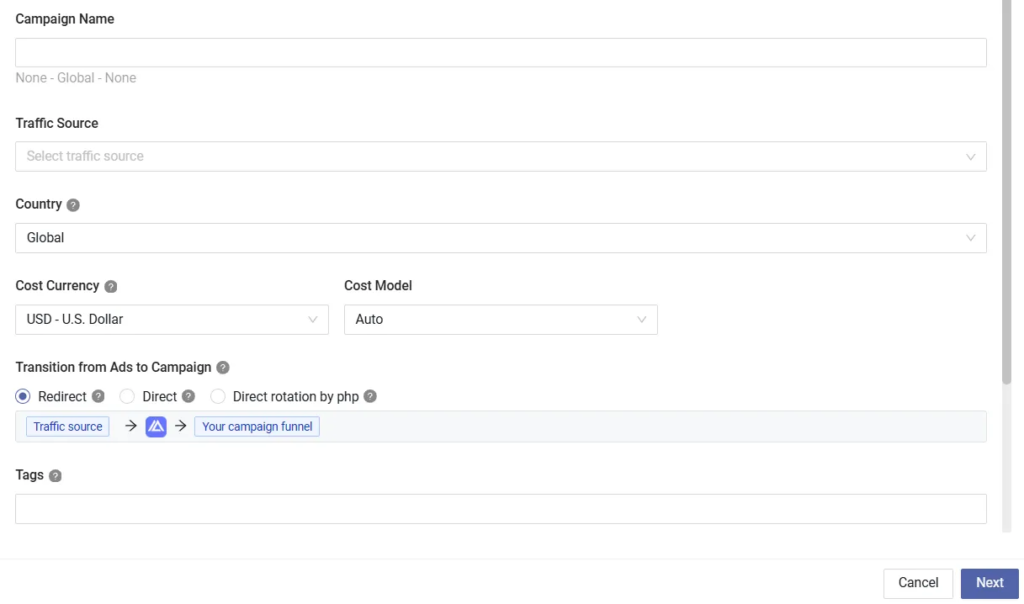
Next, fill in your campaign details such as:
- Campaign name
- Traffic source
- Target country
Then click “Next”.
After that, you’ll be able to choose a redirect method.
Personally, I usually choose: 302 – Referrer.
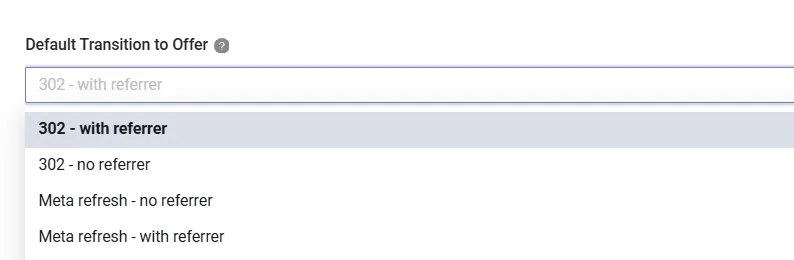
From my experience, some of the other redirect options can cause significant click loss. While they may help hide your landing page from advertisers, the downside is that you often lose tracking accuracy and traffic quality.
Next, you can select your landing page.
This is also where you can test multiple landing pages at the same time if you want:
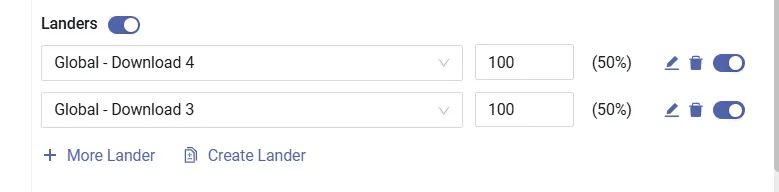
Inside this tracking platform, they don’t call them “Landing Pages” — they use the term “Landers.”
But it means the same thing.
The next step is selecting your offer.
You can also test multiple offers simultaneously if needed:
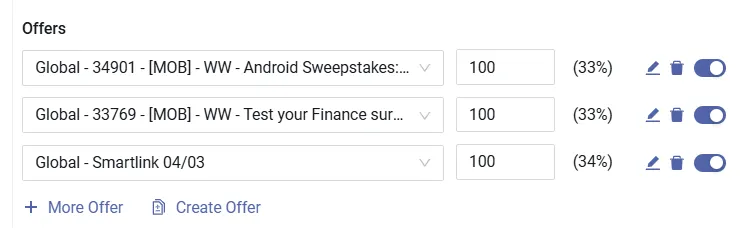
After that, click “Save” to store the campaign.
Once saved, a new URL will appear.
This is called the Campaign URL — and almost every tracking tool uses that same term:
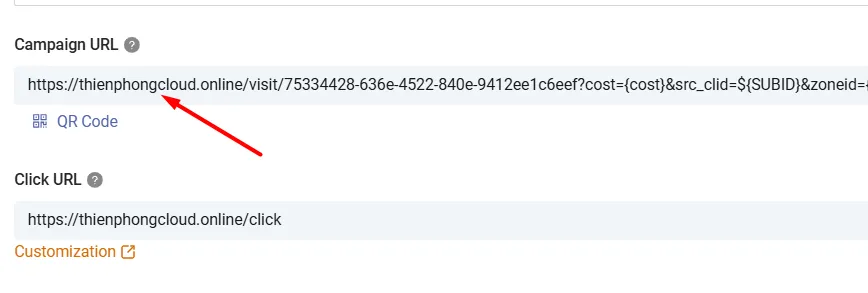
This is the actual URL you will use for your ads.
In other words, the Campaign URL is the link you place inside your advertising campaigns.
You should not directly use the affiliate link from the affiliate network inside your ads, because doing so makes it much harder to collect complete campaign data.
That’s why tracking tools require several setup steps like this — the entire process is designed to give you more complete and accurate tracking data.
Conclusion
In this article, I showed you how to set up a tracking tool for affiliate marketing.
The setup process may feel a little complicated for beginners at first, but it’s an essential step if you want to run affiliate campaigns seriously.
Once you get used to it, the entire setup becomes very fast — usually less than five minutes.
After creating your campaign, you now have a Campaign URL.
The next step is simple:
Take that Campaign URL and use it to create ads on your chosen traffic source.
In the upcoming articles, I’ll show you how to analyze campaign data and optimize your results.
See you in the next guide.